CYO Valentine Special: Valentine Coaster

Ah, love month. It’s that time of the year where all you see are red and a whole lotta lovin’!

In today’s CYO, we’ll be upgrading our usual paper and scissor craft. Let’s get down to woodwork with a little bit of creativity.

Today, we’ll be making wooden coaster for Him and Her. It may come off intimidating for someone who’s ‘creatively challenged’ but this is quite easy – and likely found just outside your house.

Valentine Coaster1
source: A Bubbly Life

What you’ll need:

– Log of wood (make sure it’s wide enough to set your glass on top)
– Saw (because we like ‘em rugged!)
– Sand paper
– Gloss polyurethane (to keep the wood from chipping and add shine)
– Heart stencil (or you can always go freestyle)
– Red paint and white paint
– Paintbrush

Let’s get started.

a.) Cut 2-inch slices using the saw. Some wood tend to chip off with heavy pressure, so it may be best to use a miter saw. But if not, you can ask your friendly carpenter to help you out.

b.) Using the sand paper, smooth out the sliced parts (top and bottom) but don’t rub on the sides.

c.) Once smooth, use the gloss polyurethane to give it an added shine. Let it air dry.

d.) Grab your heart stencil and paint away. You may opt to use a sponge and dab the paint on the surface to create a unique background for the text. Let it dry.

e.) Once dry, add the initials or special message you want to give your love one. Best practice: keep it short and sweet.

Valentine Coaster2
source: A Bubbly Life

If you’re a little fresh out of idea for your wedding tokens, you can opt to give these to your guests with your initials on it. Or amp your decorations and give it a little rustic feel by adding these wooden pieces in the walls or as a hanging décor.

Now, isn’t this a fun and easy way to create something without busting your wallet dry?

We hope you enjoyed making this one as much as we did.

Until the next CYO!


#funwithin

Pongee Staff Insights: Creating the Fun DNA


Hello there.

It’s been a while since we had our Pongee Insights. And a lot has happened since then.

For the many years, we have come to know a lot of people from all walks of life. Well, technically, from the North side of Davao. And we are growing immensely from Tagum to Panabo.

It has been such a great opportunity to keep learning and sharing experiences from these people. And we are now moving forward to the matters at hand: keeping it real.

Our realness comes from the back-end of every transactions. Planning is everything in this industry. We make the best way possible to ensure that every transaction is delivered as promised. Though glitches do happen (as expected from us humans).

But the real friction happens when things don’t go as expected. When busy schedules don’t adhere as promised. When people are too tired from a week’s worth of transactions cramped into a day’s schedule. The pain and struggle is REAL. That’s heavy stuff!

One thing I noticed though is that the people here refused to be doused by overworked, stress-related, anxiety-driven situations. Most people in Pongee makes it a habit to have fun nonetheless.

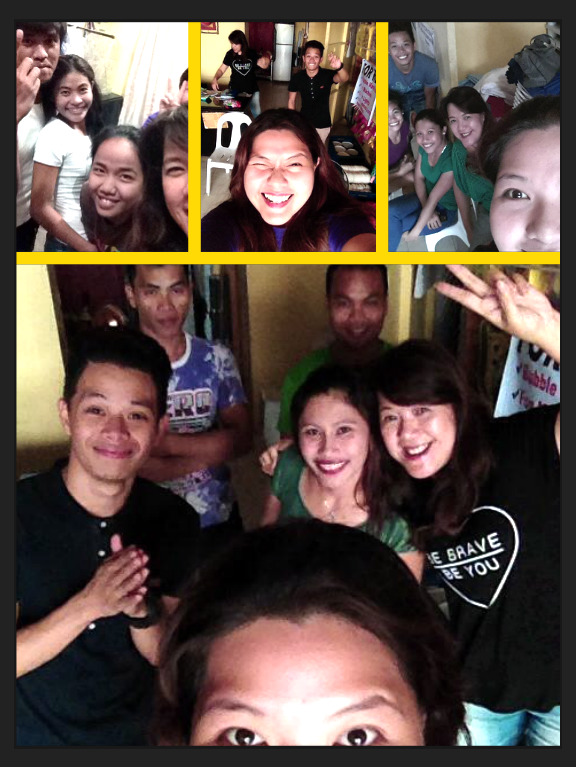
Pongee Staff Collage

Fun Within

It’s noticeable. People here have the same DNA. As we infect others to keep moving forward, to keep pushing on, we are also learning not only from our leaders, but from the bottom line. It’s such a privilege to know that we can never set limits on others and the power of encouragement to do more makes it more worthwhile to keep doing what we do best.

As part of the team, we hope to keep improving. Though it’s not going to be an overnight thing, we are hopeful. We believe that He who is greater in us will keep improving us as wood is chiseled to perfection by the Maker.

Be a blessing today.


#funwithin

Pongee Tagum

Top 5 Things to Look Into for Your Kid’s Birthday Party

Being thrifty for your kid’s birthday party can be done. You don’t necessarily have to splurge big time just to get big time results. Just a little tweaking on the decorations with these key items should do the trick.

Balloons

source: hufftingtonpost

This is the one thing that shouldn’t be missing in your kid’s birthday party. Decorating your area using balloons sets the mood for the party.

Birthday parties need to have an inviting environment using vibrant colors of balloons and other decorations. And lastly, kids can take home a balloon or two as part of their ‘prize’ for coming!

We also did a fun DIY for an event just to tweak this concept. Check out our CYO balloon and streamer here.

Program

It’s best to create a simple program or have a friend to help you with it. Games will most likely dominate most of your program so it’s best to spread it by category for kids, adults and for both. If you’re not really keen in hosting the party, you may have a friend or a colleague to do that for you. His or her hosting doesn’t have to be fancy. All it takes is some confidence and a whole lot of fun to pull it off!

Feeling lazy? Why not hire an affordable kiddie package that has all things in place! You can check out your local shops or even ask them for a quotation that fits your budget.

source: pinterest

Goody Bags

Where there are games, game prizes are expected. And you don’t have to splurge on them. You can use home-made treats as game prizes. You can also mix these goodies such as small biscuits and snacks with a customized ‘thank you’ note attached to it. It’s thrifty and easy to do and won’t take much of your time planning for other important things for the party.

Pull-off a last-minute goody bag? Check our CYO pint-size goody bags to fit those home-made treats here.

Food

If you’re planning to have the party over at your house, then having friend chicken, pizza, spaghetti, burgers or barbecue might be good. These are easy to make and you won’t have to spend so much time in doing them, letting you work on other things that needs your attention. Before the party, you may also serve appetizers such as chips, nachos, pretzels, nuts and other finger foods that are readily available for your picking at your nearby store.

Sweets

A kiddie party won’t be complete with some complementary sweets. It’s the most essential part of any kiddie party – secondary to cakes. Ranging from candies to brownies, all these gives delight to every person with a sweet tooth.

You can check local shops for customized treats of your favorite characters or choice of theme. It’s easy to find and prepare these treats. If you’ve got time, here is a CYO lollies you can do at home to give it a more customized-feels to the treat.

You can always opt to hire a coordinator to do the work. Though they might stretch your set budget, they are worth it. There are lots of party coordinators that offer their services at reasonable rates. However, it’s best to check for reviews online or you can ask neighbors or colleagues for reference.

Hope this blogs helps all you #tipidmommies out there.

Until next post! 🙂

#funwithin

Create Your Own: Pint-Sized Goody Bags

Hello there.

Welcome to another post of #CYO for all the tipidmommies out there.

Today, we’ll be focusing on the goody bags. Goody bags are usually readily available in local partyshops. However, there may be party items that are not in sync with your theme.

Compared to our previous CYO goody bag, this is fairly easier to make (especially those last-minute ones!).

These CYO goody bags are perfect for occasions for kiddie parties where you can place snacks, candies and other items.

So, let’s get started!

source: realsimple

How to Create-Your-Own Pint-size Goody Bags

What you’ll need:

– Paper bags (size will depend on your preference)
– Construction paper (go for the flashy ones!)
– Fancy scissors or regular ones (if you don’t have any)
– Puncher or sharp scissors
– String or ribbons
– Colorful paper clips for effect (or you can go clean and go for a double-sided tape instead)
– Crayons or pentelpen
– Goodies

Instructions:

a.) Fill the bag with goodies.

b.) Punch a hole in the center. You can also use a sharp scissor.

c.) Fill the bag with popcorn, candies, jelly beans or small toys.

d.) Cut pieces of paper using your scissors. Add some flair to it by adding cutting unusual shapes along its corners.

e.) Write the name of the people these goodie bags belong to.

f.) Get some paperclips and clip the tags on the bags. Or you can opt to place a double-sided tape at the back of the badge and stick it in.

g.) Get a quarter of a meter of ribbon or string, tie a bow and you’re done!

Optional: Should you want to turn this into an open-bag, you can punch holes on the sides (about 1-2 inches away from the edges), and then place the ribbons for both ends.

These easy and fun goody bags are quick and easy to do with the family.

It’s suitable for the birthdays and with the incoming holidays, this should take care of those jiffy goodies you need to share with the kids.

That’s it for this CYO project. We hope this sparked some creativity without burning a hole on that wallet!

Until the next post. 🙂

#funwithin

Create Your Own: Ruffled Streamers with Balloons

Hello there.

It’s another series for the ‘tipid’ mommies out there who are low on the budget but high on the inspiration!

In today’s #CYO, we will be creating a makeshift curtain made of balloons and ruffled streamers.

This is a cute decoration you can do at home with the family where the materials may be just lying around the house.

Let’s get started!

What you’ll need are:

– Scissors
– Balloons
– Air pump
– Ribbons
– Nylon string
– Crepe paper (or you can opt for Japanese paper or whatever fits your fancy)
– Thin clear strips (you may use plastic covers)
– Sticky tape (or paste)
– Scotch tape

Optional: Embezzlements

Instructions:

BALLOONS

a.) Start with the balloons. Inflate the balloons and tie the bottom. Make sure the sizes are in full (or whichever size you may want to fit in with the theme).

b.) After inflating the balloons, tie the end. You may use a wide ribbon to add some flair to it.

c.) Then tie the string on the end of the balloon and set it aside. Make sure to have a loop to end to anchor this to the ceiling later on.

source: gsfool

FRINGES

d.) Get your crepe paper then cut it into 1-2 inch strips.

e.) Once these are cut, get your plastic cover. Cut into thin strips (cut into 0.5 to 1 inch strips) depending on the number of fringes you’ll use. If you don’t have plastic cover, you can use thin strips of cartolina for this.

f.) Place your sticky tape on the plastic cover (or if you’re using cartolina, place a thin layer of paste).

g.) Now it’s time to fringe! Pinch the crepe paper as you go. This is not a perfect art so you can go random with the spacing of your pinches as long as you don’t have flat bits.

h.) Then work on another layer on the other end. This will give you a two-way fringe to give it an illusion that it’s ‘sewn’. (If you‘re using paste, you may need to let it dry first before working on another layer of fringe.) Make sure to have a loop on the end to anchor the fringe.

inspiration source: natashaburns

The FUN part:

i.) Use the loop to serve as an anchor by using a scotch tape. Layer the balloons and fringes accordingly. Use different heights for this.

j.) You can also add fun embellishments on your fringes and have fun with it! Add badges, pictures or small candies to make the fringe more interesting.

And there you have it! A simple but fun decoration that you can quickly create within an hour or so. It’s a fun activity you can do with the family or friends and will make great decorations for birthdays, baptismals and other special events without spending much!

This is it for today’s CYO. Hope you can join us again next time for that ‘tipid’ facts for all mommies out there.

Until the next post. 🙂

#funwithin

Create Your Own: Homemade Lollies

Who doesn’t want lollies?

These goodies are great treats to give to kids during a birthday or other special events (even these bring relief to kiddos visiting for a doctor’s appointment).

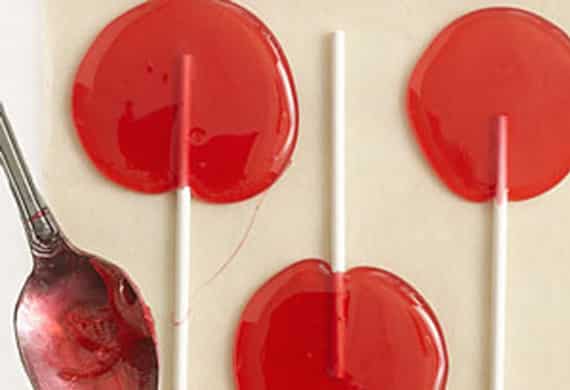
Lollies come in various shapes, sizes, colors and flavors. And you can create these brightly colored goodies in the comforts of your home. In today’s CYO, we’re going to create these simple treats for the young – and the young at heart.

source: youtube

Let’s get started!

You’ll need the following ingredients:

12 stick (regular balloon stick may work with this or depending on your mold)
1 cup of sugar
Half a cup of water
2 tablespoon of corn syrup (if possible, go for the lighter ones)
4 to 8 drops of food coloring (go crazy and get imaginative with the color combinations!)
2 to 3 drops of flavoring oil of choice (these may be purchased in local stores)

Optional: Use a mold to create smooth shapes.

Instructions:

a.) Get a large baking sheet (if you don’t have any, you can improvise and use large rectangular containers).

b.) Arrange the sticks on the sheet, making sure that it has a 4-inch gap from each other.

c.) Place your saucepan on moderate heat, combining your sugar, corn syrup and water. Stir all ingredients in the pan until sugar is dissolved. Cover the saucepan and heighten the heat, and boil this for a minute to make sure all crystals are wash down. Remove the cover until the thermometer registers 310 Fahrenheit (make sure you’re using a candy thermometer for this). If you don’t have a candy thermometer, you just needed to check the pan every once in a while to make sure that all candies are melted.

d.) Remove the saucepan from the stove and place it on a wire rack or leave it on your stove for 5 minutes to cool for a bit.

e.) Add flavoring oil and stir until the color is even (or design according to your preference).

f.) Get your spoon and pour the mixture on top of the lollipop stick, making a circular shape (as best as you can) of about 2 to 3 inches in diameter.

source: kidcrave

g.) Leave these formed lollies to cool completely for the shape to take form and the candy to harden.

h.) Get the wrapper (you can customize it and print out pictures or colorful designs to give it a more customized feel).

i.) Secure the candy with a colorful tie (or ribbon).

You can do this with the kids or have the family help out. Add fun to these simple treats by adding trinkets or uniquely shaped candies in the center.

Not only are these real money-savers, they make for a unique giveaway fit for any occasion!

This is it for today’s CYO.

Until next post!

#funwithin

Create Your Own: Partyhat Goodie Bags

Hello there.

It has been a while since our last post.

First, what is CYO?

CYO is a recently launched series to help thrifty moms and dads create their own party items without breaking a hole in their wallet.

Now that’s done, let’s get started.

This is a fun and easy to do activity that your kids can help you out with.

In today’s topic, we’re going to guide you how to create your own partyhat bags using only the following materials:

– Partyhats of choice (You can purchase them in local partyshops in your neighborhood)
– Some crepe paper or art paper
– Decorative scissors (or you can opt for a plain one)
– Strings or ribbons
– Glue

Instructions:

a.) First, you’ll need to cut the corners of your partyhats (2 in this case). Cut the edges to create a smooth and rounded curve.

b.) Once this is done, get your crepe paper or art paper. Create a paper-bag type pattern to fit in all your goodies. Make sure that the form is close to your partyhat’s pattern. There should be a 1 to 2 inches allowance away from the edges to keep it looking ‘clean’ and polished.

c.) Paste your formed crepe paper or art paper ‘bag’ inside the partyhats.

d.) Ready your treats, dump ‘em and these are good to go!

You can get creative and put on stickers and other personalized tags. This solid trick should help keep your expenses down without compromising the quality of your kid’s birthday party.

We hoped you like our first CYO post. We’ll be uploading more makeshifts where CYO-ers can enjoy and get things done on a thrifty budget.

Until the next post!

Get a daily dose of inspiration from our IG account. Follow us in Instagram: @pongeetagum

Valentines Season Special — 3 Ways to Make Her Kilig

Source: http://courage-to-live-my-best-life.blogspot.com/2012/05/while-we-try-to-teach-our-about-life.html


For all the men out there, this is the moment of truth: Makukuha mo ba ang matamis nyang OO – o hindi? Here are some ‘pogi’ points to help you get started.

Dress up for success

Nothing attracts a woman more than a man who has dreams and goals in his life. Well, you don’t have to be “Mr. Perfect” to get her attention. Take a more proactive way on kicking out your bad habits. This will surely keep her interested and let her know that you’re worth her time.

Get to know her

You’ve heard this before: “First impression lasts”. This may still be the case for most women. In order to get her attention, converse with her in a way that make feel that you’re really interested in what she’s saying.  Avoid talking more about you, you and more you. If the feeling is mutual, you’ll likely get the same response back.

Choosing your weapon

Now that you’re set for THE date, you’ll need a BMW, chauffer and some expensive champagne. But this is only applicable if you’re that rich guy from the other side of town.

You only need three key accessories: chocolates, flowers and most importantly, yourself. Going for traditional may still work for most women. It gives you the impression that you’re a romantic.

Of course, you can always go for a little bit of poetry. You don’t have to be Shakespeare to let that person know you like her. You may also opt to take her to a fancy restaurant and have a band play the songs that she likes.

So who says Valentines is a pain?

Get the latest updates on our VALENTINES SEASON SPECIALS and CHOCO TREATS at Pongee Partyshop (Tagum Branch) 

Pongee logo

Party Items Must-Haves when Organizing a Kiddie Party

Parents are frequently asking this one question: How will I get the most of my budget? Smart moms always have the right answers — along with the right resources. And for the moms out there struggling how to create ‘magic’ with their budget, the secrets are being revealed below.

In planning for a kiddie party, it is important to have the right party items on hand. Of course,a large part of a great kiddie party is all about the ‘visuals’.

Mothers, it’s important that you do your planning beforehand. If you’re on a tight schedule (especially for the working moms out there) or your time is limited, making the most of your time will highly impact the success of your party. So create a list of thing you’d want for the party, then canvas. Don’t do the opposite.

If you’re planning to have specific party in mind, most specialty items are found in most party suppliers or party shops. The key is to know what you want, where you’ll need to get them and what these items are. If you know this, then you’ve already slashed ¼ of planning time.

20130921_123536 (Adding these unique party hats adds fun to the whole concept)

20130921_123517

(Or you can go generic. It’s safer as well.)

Going for common party supplies will less of a hassle as that of planning an uncommonly themed party (e.g. Transformers, Finding Nemo, etc.). Paper products, banners, party favors and giveaways may not be much of problem because you’ll usually see these in your local party shops. Usual themes such as Disney Princesses, Dora, Barney and Spongebob are common among parties set for 1 to 8 years old.

kiddie party package, affordable kiddie packages, kiddie party giveaways, kiddie party entertainment, kiddie birthday party, kiddie party planners, first birthday party Philippines, birthday party packages, birthday party ideas
(Fun birthday banners)

20130921_123156(These are cool finds as add on for your kiddie party. Anyone up for some photos?)

Decorations also play an important role in brightening up a simple room or hall. If you don’t want to spend additional costs on manpower, you can have friends, family members and even co-workers in helping out with the decorating. You can just purchase decorations like banners, banderitas and balloon arrangements from your local partyshop and you’re good to go!

20130921_123140(Animal party hats gives uniformity to a ‘safari’ or animal-themed party)

20130921_123233(It can also go with this cool animal mask!)

20131008_110925(Safe pinatas anyone? This cute popper is also a unique find!)

20131008_111110(Save on giveaways with these themed party lootbags)

20131008_111132(Just add customized stickers on these giveaways)

So there’s actually a way to make your kid’s party an exceptional one. No magic tricks. Just plain resourcefulness and partnering with the right people. If you’re planning to have a kiddie party any time soon, it might be best to make initial drafts now on how you want and make adjustments along the way. If you a success story on how you created a budget-friendly kiddie party, feel free to share your success plans below!

All party items are found @ Pongee Partyshop (Tagum Branch)

Professional party planners? Partner with the right people and make the most of your kid’s celebration with us. Click here to get in contact with our representatives here.